


Enhancing athletic performance unlocking the power of spring-ankle for efficient energy transfer and stability
Why do the Spring Ankle exercises
- Spring ankle exercises have proven to yield extraordinary results in foot and ankle development for athletes across all levels. This profound impact is not limited to elite athletes alone; even developmental athletes can experience greater improvements in comparison.
- Efficient Energy Transfer: The series focuses on minimizing energy leaks and optimizing energy transfer along the entire chain of muscles and joints involved in dynamic movements. By addressing ankle stability and function, athletes can improve their power output and overall performance.
- Ankle Instability and Performance: Ankle instability can significantly limit an athlete’s speed potential and overall performance. Weaknesses and instability in the foot and ankle can lead to compensatory movements, reduced force output, and potential injuries.
- Impact on the Kinetic Chain: Foot and ankle instability can have cascading effects on other joints in the kinetic chain, such as the knee and hip. Weak ankles can lead to tight hips, lower back problems, and even knee pain. Addressing ankle stability is crucial for maintaining overall structural integrity and optimal performance.
history of spring-ankle training
The Spring Ankle Series, Created by Sport/Speed performance coach Chris Korfist, aims to enhance the transfer of power from the body to the ground by strengthening the entire chain of muscles and structures involved. When power is efficiently transferred, the body can achieve optimal performance without restricting power output or experiencing significant energy loss. Athletes often possess strength in specific positions, but lack structural strength in others, even when only slight deviations are required. Since sports involve pushing off from various angles, it is crucial to help athletes become efficient and minimize energy leaks that occur during these dynamic movements.
To maximize energy transfer along the entire chain, it is essential to identify and address potential power leaks. The foot and ankle, in particular, are prone to such leaks. Surprisingly, up to 30% of energy can be lost in the foot alone. While some degree of energy leakage is necessary, we aim to minimize unnecessary losses. The body cannot handle 100% of the energy produced throughout the entire chain, but our goal is to minimize excessive leaks that hinder efficient energy transfer.
The instability of the ankle can significantly limit an athlete’s speed potential. When the ankle cannot support the body’s weight and absorb the necessary force, the body subconsciously restricts its action to prevent injury. The body downregulates its speed, resulting in a reduced force output during running. Thus, the instability of the ankle becomes a limiting factor in an athlete’s speed and performance. By addressing ankle stability through appropriate exercises, it is possible to unlock an athlete’s full speed potential.
Add Your Heading Text Here
If the foot and ankle are unable to adequately handle the forces generated during running, instability can arise, leading to various issues. When the foot’s arch collapses upon impact, weaknesses and instability may occur. Consequently, the body’s search for stability extends up the kinetic chain, affecting the knee and hip joints. The hip muscles tighten up as the body attempts to compensate for the lack of stability, potentially resulting in tight hips and lower back problems. It becomes evident that unstable ankles can negatively impact an athlete’s overall performance, regardless of whether they are a jogger, sprinter, or engaged in other sports activities.
One of the primary causes of knee pain in athletes can often be traced back to foot and ankle instability. The foot’s ability to absorb forces directly affects the knee joint. If the ankle is weak and unstable, the body instinctively downregulates the force output, limiting the body’s ability to generate optimal power. Consequently, athletes may experience reduced performance and potential knee pain. It is crucial to recognize that instability in the ankle can contribute to pain originating from both the ankle and hip joints.
whats next?
What’s Next
Once the athlete has developed basic foot function, it is time to progress to isometric strength patterns. Initially, these exercises should be performed using only body weight. To build strength efficiently, athletes can incorporate these exercises multiple times throughout the day or week, while monitoring their level of fatigue. Before progressing to overloaded exercises, it is crucial for the athlete to be able to hold their body weight on one limb for one minute. Additionally, it is important to perform the exercises at various joint angles with different mechanical demands to accommodate the 15° range of motion in either direction. The goal is to achieve a high degree of structural efficiency and strength in every position, recognizing that varying joint angles will promote strength adaptations not only in the ankle complex but also further up the chain, including the ankle, knee, lateral sling, and torso.
The reason we start with isometrics in a single-leg position is to ensure that the body can effectively absorb the force applied to the ground with its own body weight. It is common for runners to lack the necessary isometric strength to hold the ankle joint in place when accelerating and pushing off the ground horizontally. As a result, the heel drops significantly, forcing the shin to become more vertical. This vertical force factor is suboptimal compared to a horizontal force vector. To truly improve acceleration or sprinting, it is essential to ensure that the ankle joint can support the athlete’s body weight.
However, most athletes struggle to hold their body weight for a sufficient period of time. This creates a problem because even if they have developed force and power in their legs, hips, and torso, the body will instinctively downregulate the force being applied when pushing off the ground. This is due to the body’s awareness that the ankle and the rest of the chain are not capable of handling such demands. Consequently, the body limits the force to prevent injury. By neglecting to adequately prepare the ankle, we essentially impose an internal governor on the entire system, reducing its maximum power output.
This raises the question of why invest time in the weight room to build impressive squat numbers when the foot and ankle collapse under force, rendering that power useless during sprinting or sports performance? Regardless of differences in athletes’ physical characteristics, the fastest athletes in the world share one common characteristic: highly efficient abilities to transmit and transfer force.
It is straightforward: the more force an athlete can withstand after driving their foot into the ground, the faster they will be. The body instinctively regulates the force produced based on what the foot and ankle can support, ensuring it does not exceed safe limits. The basic isometric pattern involves emphasizing weight distribution on the big toe and second toe. If an athlete displays a shift in the pinky toes, causing them to crawl under the foot when in a raised position, instruct them to try pulling their pinky toes into a dorsiflexed position. This cue helps strengthen the outside arch of the foot. Once they can hold the pinky toe position, they can focus exclusively on applying pressure directly through the big toe.
For athletes with poor structural abilities in the foot, a useful technique is to guide them into position using both feet, and then have them slowly lift the non-training side foot while maintaining proper foot positioning under tension. The Spring Ankle Series involves performing isometric contractions in various positions, including three thigh positions and two ankle positions. Each position will be discussed in the following sections, supplemented with photos and videos to aid in coaching techniques.
spring ankle position 1
Spring Ankle Position 1
The first position of the Spring Ankle Series focuses on deep thigh position with ankle dorsiflexion. The athlete begins by stepping up onto a small elevated box or plate, with only the pads of their feet on the plate. From this position, the athlete aims to touch the ground with the back edge of their heel while lifting their heel slightly. It is crucial to ensure that the athlete maintains an active and engaged hold, rather than a loose passive position. The goal is for the athlete to find their end range in dorsiflexion and then lift their heel slightly while actively driving the big toe into the elevated box or plate. This creates stiffness in the arch of the foot, generating a tension-bound active isometric contraction.
Once the athlete has found their end range and achieved the desired position, guide them into a deep knee squat by pushing their knees forward over the toes. Once in this deep squat position, the athlete should very slowly lift one foot off the plate and maintain balance on a single leg. They should hold this position for the prescribed time before transitioning out of it.
As a side note, when athletes are new to the Spring Ankle Series, it may be beneficial for them to reestablish their center of balance with both feet after completing the isometric hold. They can do this by placing the opposing foot back on the elevated box and redistributing their weight evenly for a second before transitioning to train the other side. This approach helps alleviate tension and discomfort in the foot and ankle before rapidly moving out of the position. The isometrics held in this position are particularly important for the acceleration phases in sprinting, as they help develop the necessary strength and stability.
By focusing on the deep thigh position with ankle dorsiflexion and incorporating the isometric holds in this exercise, athletes can improve their foot and ankle strength, which is vital for optimal performance in acceleration during sprinting.
spring ankle position 2
Spring Ankle Position 2
The Spring Ankle Position 2 in the series closely resembles Spring Ankle Position 1, with a focus on a different ankle position—plantar flexion. After emphasizing the importance of efficient function in dorsiflexion, it is crucial to address the role of plantar flexion in force transfer.
Transferring force efficiently is a key aspect we aim to emphasize in this manual. The goal is to enable athletes to maximize force transfer while minimizing energy leaks, resulting in increased explosiveness. It is essential to recognize that as energy transfer efficiency improves, the risk of injury decreases.
Many athletes may struggle to achieve perfect positioning in this slight variation and may find it challenging to handle external resistance or maintain time under tension. It is important to clarify that all external load in these exercises is limited to bodyweight only.
To perform Spring Ankle Two, the athlete begins by stepping onto the elevated platform as in the previous exercise. From there, they perform a deep squat, pushing their knees forward. Once in this position, they lift their heels and drive their toes down, actively engaging in plantar flexion.
As discussed earlier, we are aiming for a 45-degree angle from the base of the big toe through the heel. Throughout the exercise, constantly remind the athlete to lift their heel as high as possible, ensuring they achieve the full range of motion. Encourage the athlete to generate maximum tension along with this range of motion and maintain an active isometric contraction throughout the exercise.
spring ankle position 3
To transition into this position, the athlete will once again perform a single-leg heel raise with dorsiflexion, but this time with a slight bend in the knee. We refer to this knee position as the mid-thigh position of the exercise. Training in different positions throughout the entire chain is crucial because we rarely move with locked knees, and it is important to ensure that the joints are structurally strong in the finished position.
Start by guiding the athlete into a dorsiflexed position. You may notice a deviation in the athlete’s range of motion compared to the first position, which is influenced by the knee position. Athletes often struggle to gain range of motion in deeper positions, but as they stand taller, there is less mechanical stress on the knee and ankle, allowing for increased ankle range of motion.
Again, emphasize that the athlete actively pulls their heel as deep as possible into the end range, rather than simply relaxing. From this position, the athlete will follow the same steps as in Spring Ankle One. The main difference is the thigh position. We have addressed the deep position, and now we are focusing on the mid-thigh position. Incorporating variations in thigh positions ensures that the entire chain is properly addressed. These different thigh positions also have correlations with performance qualities such as take-off, acceleration, and top-end speed, which will be covered in an upcoming manual.
As with every Spring Ankle position, ensure that the athlete locates and locks in the perfect position with both feet on the ground. Once the feet, ankles, knees, and torso are aligned optimally, the athlete can gently lift the opposing foot and begin the single-leg exercise.
Spring ankle position 4
The Spring Ankle Position 4 mirrors the thigh position of Spring Ankle Position 3. The key alteration in this exercise lies in the positioning of the ankle. Here, the athlete performs the exercise in a plantar flexed position. Instruct the athlete to step up onto the elevated platform, drive their knees forward, and strive to reach their highest point of plantar flexion. Once the athlete has found this optimal heel position, they will slowly lift one foot off the platform and hold the isometric position.
It is important to emphasize to the athlete the need to maintain their heel as high as possible throughout the entire duration of the hold. Often, athletes may initially locate the proper position but struggle to sustain it for more than a few seconds. This can be attributed to factors such as limited foot function or a lack of awareness on how to achieve and maintain the position. It could be due to a weak foot that lacks function under tension or an inefficient nervous system that lacks the myelinated signaling response required for the position. Regardless of the underlying cause, providing consistent external feedback will greatly assist the athlete in becoming aware of the position and achieving the desired increase in function.
By focusing on maintaining a plantar flexed position and keeping the heel elevated, athletes can enhance their foot and ankle function. Consistent feedback and practice will help them develop the necessary awareness and signaling response to maintain the position effectively.
spring ankle position 5
The final position in the series is a basic heel raise. While this movement can be performed on the ground, it is preferable to have athletes perform it in an elevated position, such as on a step or a small box. We have found that when the feet are raised off the ground, the body adopts a more rigid and stable position. Our recommended option is to use the Sorinex flops, which have a height of about an inch.
In this position, the athlete starts by raising their heels, bearing weight behind the big toe, and maintaining locked knees. From this starting position, the athlete lifts one leg and attempts to hold a static single-leg stance in the locked position for a minute. It is important to note that the ankle joint must be in a plantar flexed position rather than a neutral position at 90°. Some athletes may have difficulty achieving the proper plantar flexion and may be locked at 90 degrees.
By performing the heel raise exercise in an elevated position and focusing on maintaining a plantar flexed ankle position, athletes can further enhance their foot and ankle function. The elevated position helps create a more stable and rigid posture, while the emphasis on plantar flexion adds an additional challenge and strengthens the relevant muscles and structures.
loading
Level 1: As discussed above, bodyweight.
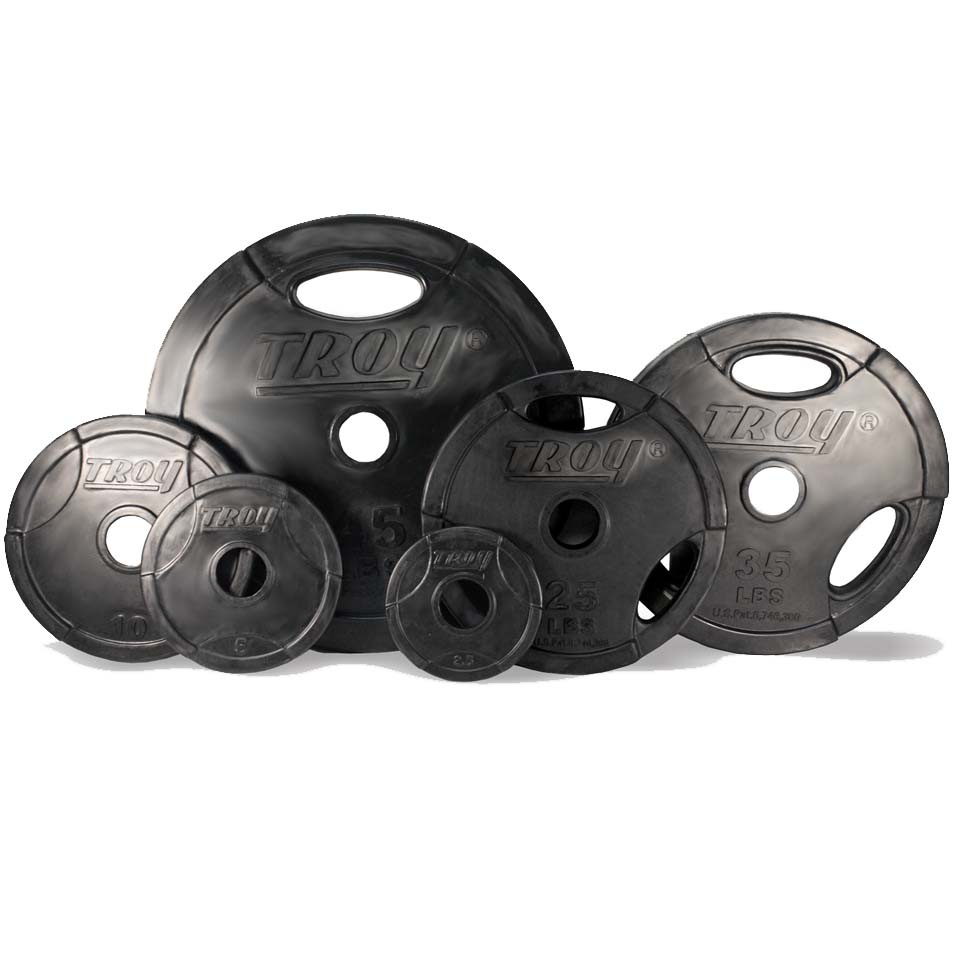
Level 2: Involves adding a dumbbell or kettlebell for resistance. The athlete holds each of the five ankle spring positions with an ipsilateral load. Like in Level One, it is crucial to maintain proper positioning throughout the exercise before advancing to the next level. Each Level Two exercise is performed for 30 seconds. The external load can start at around 20-30 lbs, but it depends on the athlete’s ability to maintain proper positioning.
An example in spring ankle position one is with level 2 loading.
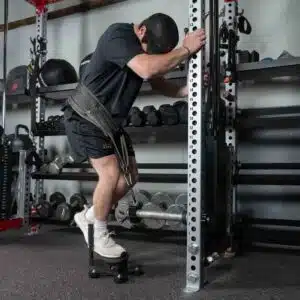
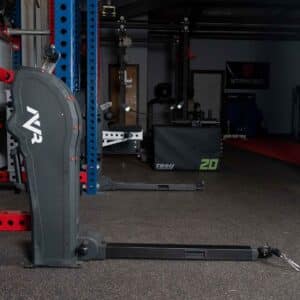
Level 3: Two options are available for external resistance: using a belt squat machine or applying manual resistance. With the belt squat, resistance is applied through a downward pull. Manual resistance involves a partner or coach placing their hands on the athlete’s hips and applying downward tension. Caution must be exercised with manual resistance to avoid excessive force. The athlete faces increased difficulty and performs each exercise for 3 to 20 seconds. Progression in Level Three should be gradual, focusing on maintaining proper form and safety throughout the exercises.
conclusion
In conclusion, understanding the importance of ankle stability in sports performance is crucial for athletes, coaches, and trainers. The Spring Ankle Series provides a systematic approach to strengthen the foot and ankle complex, optimizing power transfer and reducing energy leaks. By addressing ankle stability and function, athletes can improve their acceleration, speed, and overall performance.
The Spring Ankle Series consists of five positions, each targeting different aspects of ankle function and stability. Through isometric contractions, athletes develop strength and structural efficiency in various joint angles and positions. These exercises can be performed with body weight initially and gradually progressed to incorporate external loads in Levels Two and Three.
Ankle instability can hinder an athlete’s performance and increase the risk of injuries. Unstable ankles contribute to force leaks, compensatory movements, and decreased power output. By addressing ankle stability and function through the Spring Ankle Series, athletes can unlock their full potential and improve their ability to transfer force efficiently.
The Spring Ankle Series is a valuable tool for athletes at all levels, helping them develop a strong and stable foot and ankle complex. It is important to progress through the series gradually, ensuring athletes can maintain proper form and positioning before advancing to the next level. By incorporating these exercises into training programs, athletes can enhance their performance, reduce the risk of injuries, and maximize their athletic potential.
The RPR Complete Foot Wake up Drills – done before a workout and or spring ankles exercises